I've had a Shabby Chic theme going on in the master bedroom for many, many years. Back when Mervyn's was around, I snatched up everything I could from the Rachel Ashwell collection. I was obsessed (and still am) with all things pink roses and vintage yumminess. Target still carries some of her stuff and I think I have almost one of everything.
Anywho, during the last few months, hubby and I have been adding some beachy elements to the room. (I think it might have something to do with researching and writing Island Ice and the fact that I love the ocean.)
We've never had a real headboard and used a full-length mirror hung horizontal in place of one for years. Here's an old photo to give you an idea of what I'm talking about...
 |
| Look how young my little writing partner is!!! |
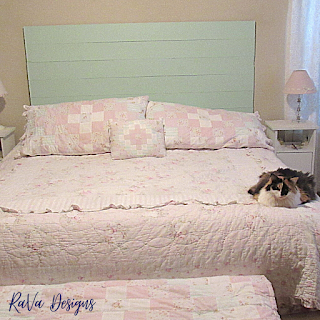
After seeing some headboard ideas on good ole Pinterest, I decided to make my own. Hubby took me to Home Depot and gave my artistic vision free reign. It was actually pretty simple and I wish we would have done it years ago. All we did was buy six 1x6 six foot boards, bracket them together on the back and slap some paint on. (Well, it involved a little more effort than that, considering we didn't have any directions to follow and were just winging it!)
I chose "New Mint Green" because I wanted something minty that would match my existing bedding.
I liked the paint so much that we ended up painting a dresser and a blanket box the same color.
I made the pillow, pillow shams, and the blanket on top of the hope chest myself, back when I got bored one day and decided to unearth the sewing machine from the back of the closet. :)
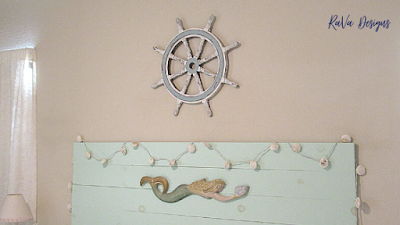
As much as I loved the new headboard, I thought it needed a little something extra. And so I found these seashell lights on Amazon.
And then I ordered some wall art from Bed Bath and Beyond's Coastal Collection. I found a beautiful mermaid that I planned on hanging in the master bath.
On their website, they show her hanging vertically. Turns out, she was a little too big for the bathroom space and then hubby had the genius idea to turn it horizontal and hang it on the headboard!
But we didn't stop there! Because there is such a large wall behind the bed, we decided we needed something else, a statement piece, if you will, to hang above the headboard. At first I was thinking of an anchor (because my hubby is my anchor - sappy, I know) and then we found a Shabby Chic-looking nautical ship wheel.
The wheel really ties everything together and looks incredibly like something Rachel Ashwell would pick out herself.
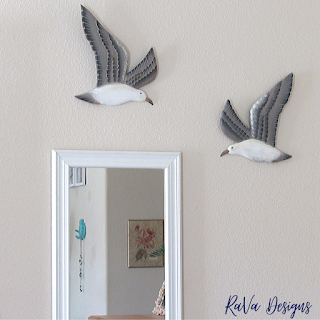
The sea gulls...
...because you know I had to have something bird-related in my room!
And the sand dollar...
(They had a starfish, too, but unfortunately I ran out of wall space!)
And we found a pretty pot for our palm tree and added some seashells to hide the dirt...
So, needless to say, I absolutely love the finished look in all its glory. Hubby calls it Coastal Chic and I couldn't think of a better way to describe it.
I hope this inspires you to carve out a pretty space in your own home, where something as small as a little stuffed animal can make you smile every time you see it.
~Rachelle
Here's to creating something beautiful that makes your heart happy!


No comments:
Post a Comment